Datenschutzerklärung
Diese Datenschutzerklärung klärt Sie über die Art, den Umfang und Zweck der Verarbeitung von personenbezogenen Daten (nachfolgend kurz „Daten“) im Rahmen der Erbringung unserer Leistungen sowie innerhalb unseres Onlineangebotes und der mit ihm verbundenen Webseiten, Funktionen und Inhalte sowie externen Onlinepräsenzen, wie z.B. unser Social Media Profile auf (nachfolgend gemeinsam bezeichnet als „Onlineangebot“). Im Hinblick auf die verwendeten Begrifflichkeiten, wie z.B. „Verarbeitung“ oder „Verantwortlicher“ verweisen wir auf die Definitionen im Art. 4 der Datenschutzgrundverordnung (DSGVO).
Verantwortlicher
Initiative for Innovation and Collaboration in Healthcare e.V.
Fehrbelliner Str. 89
10119 Berlin
Vertreten durch: Joscha Hofferbert, Dr. Katarina Braune, Dr. Akira-Sebastian Poncette
Registereintrag: Eintragung im Vereinsregister
Registergericht: Amtsgericht Charlottenburg (Berlin)
Registernummer: VR34738B
Arten der verarbeiteten Daten
– Bestandsdaten (z.B., Personen-Stammdaten, Namen oder Adressen).
– Kontaktdaten (z.B., E-Mail, Telefonnummern).
– Inhaltsdaten (z.B., Texteingaben, Fotografien, Videos).
– Nutzungsdaten (z.B., besuchte Webseiten, Interesse an Inhalten, Zugriffszeiten).
– Meta-/Kommunikationsdaten (z.B., Geräte-Informationen, IP-Adressen).
Kategorien betroffener Personen
Besucher und Nutzer des Onlineangebotes (Nachfolgend bezeichnen wir die betroffenen Personen zusammenfassend auch als „Nutzer“).
Zweck der Verarbeitung
– Zurverfügungstellung des Onlineangebotes, seiner Funktionen und Inhalte.
– Beantwortung von Kontaktanfragen und Kommunikation mit Nutzern.
– Sicherheitsmaßnahmen.
– Reichweitenmessung/Marketing
Verwendete Begrifflichkeiten
„Personenbezogene Daten“ sind alle Informationen, die sich auf eine identifizierte oder identifizierbare natürliche Person (im Folgenden „betroffene Person“) beziehen; als identifizierbar wird eine natürliche Person angesehen, die direkt oder indirekt, insbesondere mittels Zuordnung zu einer Kennung wie einem Namen, zu einer Kennnummer, zu Standortdaten, zu einer Online-Kennung (z.B. Cookie) oder zu einem oder mehreren besonderen Merkmalen identifiziert werden kann, die Ausdruck der physischen, physiologischen, genetischen, psychischen, wirtschaftlichen, kulturellen oder sozialen Identität dieser natürlichen Person sind.
„Verarbeitung“ ist jeder mit oder ohne Hilfe automatisierter Verfahren ausgeführte Vorgang oder jede solche Vorgangsreihe im Zusammenhang mit personenbezogenen Daten. Der Begriff reicht weit und umfasst praktisch jeden Umgang mit Daten.
„Pseudonymisierung“ die Verarbeitung personenbezogener Daten in einer Weise, dass die personenbezogenen Daten ohne Hinzuziehung zusätzlicher Informationen nicht mehr einer spezifischen betroffenen Person zugeordnet werden können, sofern diese zusätzlichen Informationen gesondert aufbewahrt werden und technischen und organisatorischen Maßnahmen unterliegen, die gewährleisten, dass die personenbezogenen Daten nicht einer identifizierten oder identifizierbaren natürlichen Person zugewiesen werden.
„Profiling“ jede Art der automatisierten Verarbeitung personenbezogener Daten, die darin besteht, dass diese personenbezogenen Daten verwendet werden, um bestimmte persönliche Aspekte, die sich auf eine natürliche Person beziehen, zu bewerten, insbesondere um Aspekte bezüglich Arbeitsleistung, wirtschaftliche Lage, Gesundheit, persönliche Vorlieben, Interessen, Zuverlässigkeit, Verhalten, Aufenthaltsort oder Ortswechsel dieser natürlichen Person zu analysieren oder vorherzusagen.
Als „Verantwortlicher“ wird die natürliche oder juristische Person, Behörde, Einrichtung oder andere Stelle, die allein oder gemeinsam mit anderen über die Zwecke und Mittel der Verarbeitung von personenbezogenen Daten entscheidet, bezeichnet.
„Auftragsverarbeiter“ eine natürliche oder juristische Person, Behörde, Einrichtung oder andere Stelle, die personenbezogene Daten im Auftrag des Verantwortlichen verarbeitet.
Maßgebliche Rechtsgrundlagen
Nach Maßgabe des Art. 13 DSGVO teilen wir Ihnen die Rechtsgrundlagen unserer Datenverarbeitungen mit. Für Nutzer aus dem Geltungsbereich der Datenschutzgrundverordnung (DSGVO), d.h. der EU und des EWG gilt, sofern die Rechtsgrundlage in der Datenschutzerklärung nicht genannt wird, Folgendes:
Die Rechtsgrundlage für die Einholung von Einwilligungen ist Art. 6 Abs. 1 lit. a und Art. 7 DSGVO;
Die Rechtsgrundlage für die Verarbeitung zur Erfüllung unserer Leistungen und Durchführung vertraglicher Maßnahmen sowie Beantwortung von Anfragen ist Art. 6 Abs. 1 lit. b DSGVO;
Die Rechtsgrundlage für die Verarbeitung zur Erfüllung unserer rechtlichen Verpflichtungen ist Art. 6 Abs. 1 lit. c DSGVO;
Für den Fall, dass lebenswichtige Interessen der betroffenen Person oder einer anderen natürlichen Person eine Verarbeitung personenbezogener Daten erforderlich machen, dient Art. 6 Abs. 1 lit. d DSGVO als Rechtsgrundlage.
Die Rechtsgrundlage für die erforderliche Verarbeitung zur Wahrnehmung einer Aufgabe, die im öffentlichen Interesse liegt oder in Ausübung öffentlicher Gewalt erfolgt, die dem Verantwortlichen übertragen wurde ist Art. 6 Abs. 1 lit. e DSGVO.
Die Rechtsgrundlage für die Verarbeitung zur Wahrung unserer berechtigten Interessen ist Art. 6 Abs. 1 lit. f DSGVO.
Die Verarbeitung von Daten zu anderen Zwecken als denen, zu denen sie ehoben wurden, bestimmt sich nach den Vorgaben des Art 6 Abs. 4 DSGVO.
Die Verarbeitung von besonderen Kategorien von Daten (entsprechend Art. 9 Abs. 1 DSGVO) bestimmt sich nach den Vorgaben des Art. 9 Abs. 2 DSGVO.
Sicherheitsmaßnahmen
Wir treffen nach Maßgabe der gesetzlichen Vorgabenunter Berücksichtigung des Stands der Technik, der Implementierungskosten und der Art, des Umfangs, der Umstände und der Zwecke der Verarbeitung sowie der unterschiedlichen Eintrittswahrscheinlichkeit und Schwere des Risikos für die Rechte und Freiheiten natürlicher Personen, geeignete technische und organisatorische Maßnahmen, um ein dem Risiko angemessenes Schutzniveau zu gewährleisten.
Zu den Maßnahmen gehören insbesondere die Sicherung der Vertraulichkeit, Integrität und Verfügbarkeit von Daten durch Kontrolle des physischen Zugangs zu den Daten, als auch des sie betreffenden Zugriffs, der Eingabe, Weitergabe, der Sicherung der Verfügbarkeit und ihrer Trennung. Des Weiteren haben wir Verfahren eingerichtet, die eine Wahrnehmung von Betroffenenrechten, Löschung von Daten und Reaktion auf Gefährdung der Daten gewährleisten. Ferner berücksichtigen wir den Schutz personenbezogener Daten bereits bei der Entwicklung, bzw. Auswahl von Hardware, Software sowie Verfahren, entsprechend dem Prinzip des Datenschutzes durch Technikgestaltung und durch datenschutzfreundliche Voreinstellungen.
Zusammenarbeit mit Auftragsverarbeitern, gemeinsam Verantwortlichen und Dritten
Sofern wir im Rahmen unserer Verarbeitung Daten gegenüber anderen Personen und Unternehmen (Auftragsverarbeitern, gemeinsam Verantwortlichen oder Dritten) offenbaren, sie an diese übermitteln oder ihnen sonst Zugriff auf die Daten gewähren, erfolgt dies nur auf Grundlage einer gesetzlichen Erlaubnis (z.B. wenn eine Übermittlung der Daten an Dritte, wie an Zahlungsdienstleister, zur Vertragserfüllung erforderlich ist), Nutzer eingewilligt haben, eine rechtliche Verpflichtung dies vorsieht oder auf Grundlage unserer berechtigten Interessen (z.B. beim Einsatz von Beauftragten, Webhostern, etc.).
Sofern wir Daten anderen Unternehmen unserer Unternehmensgruppe offenbaren, übermitteln oder ihnen sonst den Zugriff gewähren, erfolgt dies insbesondere zu administrativen Zwecken als berechtigtes Interesse und darüberhinausgehend auf einer den gesetzlichen Vorgaben entsprechenden Grundlage.
Übermittlungen in Drittländer
Sofern wir Daten in einem Drittland (d.h. außerhalb der Europäischen Union (EU), des Europäischen Wirtschaftsraums (EWR) oder der Schweizer Eidgenossenschaft) verarbeiten oder dies im Rahmen der Inanspruchnahme von Diensten Dritter oder Offenlegung, bzw. Übermittlung von Daten an andere Personen oder Unternehmen geschieht, erfolgt dies nur, wenn es zur Erfüllung unserer (vor)vertraglichen Pflichten, auf Grundlage Ihrer Einwilligung, aufgrund einer rechtlichen Verpflichtung oder auf Grundlage unserer berechtigten Interessen geschieht. Vorbehaltlich gesetzlicher oder vertraglicher Erlaubnisse, verarbeiten oder lassen wir die Daten in einem Drittland nur beim Vorliegen der gesetzlichen Voraussetzungen. D.h. die Verarbeitung erfolgt z.B. auf Grundlage besonderer Garantien, wie der offiziell anerkannten Feststellung eines der EU entsprechenden Datenschutzniveaus (z.B. für die USA durch das „Privacy Shield“) oder Beachtung offiziell anerkannter spezieller vertraglicher Verpflichtungen.
Rechte der betroffenen Personen
Sie haben das Recht, eine Bestätigung darüber zu verlangen, ob betreffende Daten verarbeitet werden und auf Auskunft über diese Daten sowie auf weitere Informationen und Kopie der Daten entsprechend den gesetzlichen Vorgaben.
Sie haben entsprechend. den gesetzlichen Vorgaben das Recht, die Vervollständigung der Sie betreffenden Daten oder die Berichtigung der Sie betreffenden unrichtigen Daten zu verlangen.
Sie haben nach Maßgabe der gesetzlichen Vorgaben das Recht zu verlangen, dass betreffende Daten unverzüglich gelöscht werden, bzw. alternativ nach Maßgabe der gesetzlichen Vorgaben eine Einschränkung der Verarbeitung der Daten zu verlangen.
Sie haben das Recht zu verlangen, dass die Sie betreffenden Daten, die Sie uns bereitgestellt haben nach Maßgabe der gesetzlichen Vorgaben zu erhalten und deren Übermittlung an andere Verantwortliche zu fordern.
Sie haben ferner nach Maßgabe der gesetzlichen Vorgaben das Recht, eine Beschwerde bei der zuständigen Aufsichtsbehörde einzureichen.
Widerrufsrecht
Sie haben das Recht, erteilte Einwilligungen mit Wirkung für die Zukunft zu widerrufen.
Widerspruchsrecht
Sie können der künftigen Verarbeitung der Sie betreffenden Daten nach Maßgabe der gesetzlichen Vorgaben jederzeit widersprechen. Der Widerspruch kann insbesondere gegen die Verarbeitung für Zwecke der Direktwerbung erfolgen.
Cookies und Widerspruchsrecht bei Direktwerbung
Als „Cookies“ werden kleine Dateien bezeichnet, die auf Rechnern der Nutzer gespeichert werden. Innerhalb der Cookies können unterschiedliche Angaben gespeichert werden. Ein Cookie dient primär dazu, die Angaben zu einem Nutzer (bzw. dem Gerät auf dem das Cookie gespeichert ist) während oder auch nach seinem Besuch innerhalb eines Onlineangebotes zu speichern. Als temporäre Cookies, bzw. „Session-Cookies“ oder „transiente Cookies“, werden Cookies bezeichnet, die gelöscht werden, nachdem ein Nutzer ein Onlineangebot verlässt und seinen Browser schließt. In einem solchen Cookie kann z.B. der Inhalt eines Warenkorbs in einem Onlineshop oder ein Login-Status gespeichert werden. Als „permanent“ oder „persistent“ werden Cookies bezeichnet, die auch nach dem Schließen des Browsers gespeichert bleiben. So kann z.B. der Login-Status gespeichert werden, wenn die Nutzer diese nach mehreren Tagen aufsuchen. Ebenso können in einem solchen Cookie die Interessen der Nutzer gespeichert werden, die für Reichweitenmessung oder Marketingzwecke verwendet werden. Als „Third-Party-Cookie“ werden Cookies bezeichnet, die von anderen Anbietern als dem Verantwortlichen, der das Onlineangebot betreibt, angeboten werden (andernfalls, wenn es nur dessen Cookies sind spricht man von „First-Party Cookies“).
Wir können temporäre und permanente Cookies einsetzen und klären hierüber im Rahmen unserer Datenschutzerklärung auf.
Falls die Nutzer nicht möchten, dass Cookies auf ihrem Rechner gespeichert werden, werden sie gebeten die entsprechende Option in den Systemeinstellungen ihres Browsers zu deaktivieren. Gespeicherte Cookies können in den Systemeinstellungen des Browsers gelöscht werden. Der Ausschluss von Cookies kann zu Funktionseinschränkungen dieses Onlineangebotes führen.
Ein genereller Widerspruch gegen den Einsatz der zu Zwecken des Onlinemarketing eingesetzten Cookies kann bei einer Vielzahl der Dienste, vor allem im Fall des Trackings, über die US-amerikanische Seite http://www.aboutads.info/choices/ oder die EU-Seite http://www.youronlinechoices.com/ erklärt werden. Des Weiteren kann die Speicherung von Cookies mittels deren Abschaltung in den Einstellungen des Browsers erreicht werden. Bitte beachten Sie, dass dann gegebenenfalls nicht alle Funktionen dieses Onlineangebotes genutzt werden können.
Löschung von Daten
Die von uns verarbeiteten Daten werden nach Maßgabe der gesetzlichen Vorgaben gelöscht oder in ihrer Verarbeitung eingeschränkt. Sofern nicht im Rahmen dieser Datenschutzerklärung ausdrücklich angegeben, werden die bei uns gespeicherten Daten gelöscht, sobald sie für ihre Zweckbestimmung nicht mehr erforderlich sind und der Löschung keine gesetzlichen Aufbewahrungspflichten entgegenstehen.
Sofern die Daten nicht gelöscht werden, weil sie für andere und gesetzlich zulässige Zwecke erforderlich sind, wird deren Verarbeitung eingeschränkt. D.h. die Daten werden gesperrt und nicht für andere Zwecke verarbeitet. Das gilt z.B. für Daten, die aus handels- oder steuerrechtlichen Gründen aufbewahrt werden müssen.
Änderungen und Aktualisierungen der Datenschutzerklärung
Wir bitten Sie sich regelmäßig über den Inhalt unserer Datenschutzerklärung zu informieren. Wir passen die Datenschutzerklärung an, sobald die Änderungen der von uns durchgeführten Datenverarbeitungen dies erforderlich machen. Wir informieren Sie, sobald durch die Änderungen eine Mitwirkungshandlung Ihrerseits (z.B. Einwilligung) oder eine sonstige individuelle Benachrichtigung erforderlich wird.
Erbringung unserer satzungs- und geschäftsgemäßen Leistungen
Wir verarbeiten die Daten unserer Mitglieder, Unterstützer, Interessenten, Kunden oder sonstiger Personen entsprechend Art. 6 Abs. 1 lit. b. DSGVO, sofern wir ihnen gegenüber vertragliche Leistungen anbieten oder im Rahmen bestehender geschäftlicher Beziehung, z.B. gegenüber Mitgliedern, tätig werden oder selbst Empfänger von Leistungen und Zuwendungen sind. Im Übrigen verarbeiten wir die Daten betroffener Personen gem. Art. 6 Abs. 1 lit. f. DSGVO auf Grundlage unserer berechtigten Interessen, z.B. wenn es sich um administrative Aufgaben oder Öffentlichkeitsarbeit handelt.
Die hierbei verarbeiteten Daten, die Art, der Umfang und der Zweck und die Erforderlichkeit ihrer Verarbeitung bestimmen sich nach dem zugrundeliegenden Vertragsverhältnis. Dazu gehören grundsätzlich Bestands- und Stammdaten der Personen (z.B., Name, Adresse, etc.), als auch die Kontaktdaten (z.B., E-Mailadresse, Telefon, etc.), die Vertragsdaten (z.B., in Anspruch genommene Leistungen, mitgeteilte Inhalte und Informationen, Namen von Kontaktpersonen) und sofern wir zahlungspflichtige Leistungen oder Produkte anbieten, Zahlungsdaten (z.B., Bankverbindung, Zahlungshistorie, etc.).
Wir löschen Daten, die zur Erbringung unserer satzungs- und geschäftsmäßigen Zwecke nicht mehr erforderlich sind. Dies bestimmt sich entsprechend der jeweiligen Aufgaben und vertraglichen Beziehungen. Im Fall geschäftlicher Verarbeitung bewahren wir die Daten so lange auf, wie sie zur Geschäftsabwicklung, als auch im Hinblick auf etwaige Gewährleistungs- oder Haftungspflichten relevant sein können. Die Erforderlichkeit der Aufbewahrung der Daten wird alle drei Jahre überprüft; im Übrigen gelten die gesetzlichen Aufbewahrungspflichten.
Registrierfunktion
Nutzer können ein Nutzerkonto anlegen. Im Rahmen der Registrierung werden die erforderlichen Pflichtangaben den Nutzern mitgeteilt und auf Grundlage des Art. 6 Abs. 1 lit. b DSGVO zu Zwecken der Bereitstellung des Nutzerkontos verarbeitet. Zu den verarbeiteten Daten gehören insbesondere die Login-Informationen (Name, Passwort sowie eine E-Mailadresse). Die im Rahmen der Registrierung eingegebenen Daten werden für die Zwecke der Nutzung des Nutzerkontos und dessen Zwecks verwendet.
Die Nutzer können über Informationen, die für deren Nutzerkonto relevant sind, wie z.B. technische Änderungen, per E-Mail informiert werden. Wenn Nutzer ihr Nutzerkonto gekündigt haben, werden deren Daten im Hinblick auf das Nutzerkonto, vorbehaltlich einer gesetzlichen Aufbewahrungspflicht, gelöscht. Es obliegt den Nutzern, ihre Daten bei erfolgter Kündigung vor dem Vertragsende zu sichern. Wir sind berechtigt, sämtliche während der Vertragsdauer gespeicherten Daten des Nutzers unwiederbringlich zu löschen.
Im Rahmen der Inanspruchnahme unserer Registrierungs- und Anmeldefunktionen sowie der Nutzung des Nutzerkontos, speichern wir die IP-Adresse und den Zeitpunkt der jeweiligen Nutzerhandlung. Die Speicherung erfolgt auf Grundlage unserer berechtigten Interessen, als auch der Nutzer an Schutz vor Missbrauch und sonstiger unbefugter Nutzung. Eine Weitergabe dieser Daten an Dritte erfolgt grundsätzlich nicht, außer sie ist zur Verfolgung unserer Ansprüche erforderlich oder es besteht hierzu besteht eine gesetzliche Verpflichtung gem. Art. 6 Abs. 1 lit. c. DSGVO. Die IP-Adressen werden spätestens nach 7 Tagen anonymisiert oder gelöscht.
Bei der Kontaktaufnahme mit uns (z.B. per Kontaktformular, E-Mail, Telefon oder via sozialer Medien) werden die Angaben des Nutzers zur Bearbeitung der Kontaktanfrage und deren Abwicklung gem. Art. 6 Abs. 1 lit. b. (im Rahmen vertraglicher-/vorvertraglicher Beziehungen), Art. 6 Abs. 1 lit. f. (andere Anfragen) DSGVO verarbeitet.. Die Angaben der Nutzer können in einem Customer-Relationship-Management System (“CRM System”) oder vergleichbarer Anfragenorganisation gespeichert werden.
Wir löschen die Anfragen, sofern diese nicht mehr erforderlich sind. Wir überprüfen die Erforderlichkeit alle zwei Jahre; Ferner gelten die gesetzlichen Archivierungspflichten.
Wir unterhalten Onlinepräsenzen innerhalb sozialer Netzwerke und Plattformen, um mit den dort aktiven Kunden, Interessenten und Nutzern kommunizieren und sie dort über unsere Leistungen informieren zu können.
Wir weisen darauf hin, dass dabei Daten der Nutzer außerhalb des Raumes der Europäischen Union verarbeitet werden können. Hierdurch können sich für die Nutzer Risiken ergeben, weil so z.B. die Durchsetzung der Rechte der Nutzer erschwert werden könnte. Im Hinblick auf US-Anbieter die unter dem Privacy-Shield zertifiziert sind, weisen wir darauf hin, dass sie sich damit verpflichten, die Datenschutzstandards der EU einzuhalten.
Ferner werden die Daten der Nutzer im Regelfall für Marktforschungs- und Werbezwecke verarbeitet. So können z.B. aus dem Nutzungsverhalten und sich daraus ergebenden Interessen der Nutzer Nutzungsprofile erstellt werden. Die Nutzungsprofile können wiederum verwendet werden, um z.B. Werbeanzeigen innerhalb und außerhalb der Plattformen zu schalten, die mutmaßlich den Interessen der Nutzer entsprechen. Zu diesen Zwecken werden im Regelfall Cookies auf den Rechnern der Nutzer gespeichert, in denen das Nutzungsverhalten und die Interessen der Nutzer gespeichert werden. Ferner können in den Nutzungsprofilen auch Daten unabhängig der von den Nutzern verwendeten Geräte gespeichert werden (insbesondere wenn die Nutzer Mitglieder der jeweiligen Plattformen sind und bei diesen eingeloggt sind).
Die Verarbeitung der personenbezogenen Daten der Nutzer erfolgt auf Grundlage unserer berechtigten Interessen an einer effektiven Information der Nutzer und Kommunikation mit den Nutzern gem. Art. 6 Abs. 1 lit. f. DSGVO. Falls die Nutzer von den jeweiligen Anbietern um eine Einwilligung in die Datenverarbeitung gebeten werden (d.h. ihr Einverständnis z.B. über das Anhaken eines Kontrollkästchens oder Bestätigung einer Schaltfläche erklären) ist die Rechtsgrundlage der Verarbeitung Art. 6 Abs. 1 lit. a., Art. 7 DSGVO.
Für eine detaillierte Darstellung der jeweiligen Verarbeitungen und der Widerspruchsmöglichkeiten (Opt-Out), verweisen wir auf die nachfolgend verlinkten Angaben der Anbieter.
Auch im Fall von Auskunftsanfragen und der Geltendmachung von Nutzerrechten, weisen wir darauf hin, dass diese am effektivsten bei den Anbietern geltend gemacht werden können. Nur die Anbieter haben jeweils Zugriff auf die Daten der Nutzer und können direkt entsprechende Maßnahmen ergreifen und Auskünfte geben. Sollten Sie dennoch Hilfe benötigen, dann können Sie sich an uns wenden.
– Facebook (Facebook Ireland Ltd., 4 Grand Canal Square, Grand Canal Harbour, Dublin 2, Irland) – Datenschutzerklärung: https://www.facebook.com/about/privacy/, Opt-Out: https://www.facebook.com/settings?tab=ads und http://www.youronlinechoices.com, Privacy Shield: https://www.privacyshield.gov/participant?id=a2zt0000000GnywAAC&status=Active.
– Google/ YouTube (Google LLC, 1600 Amphitheatre Parkway, Mountain View, CA 94043, USA) – Datenschutzerklärung: https://policies.google.com/privacy, Opt-Out: https://adssettings.google.com/authenticated, Privacy Shield: https://www.privacyshield.gov/participant?id=a2zt000000001L5AAI&status=Active.
– Instagram (Instagram Inc., 1601 Willow Road, Menlo Park, CA, 94025, USA) – Datenschutzerklärung/ Opt-Out: http://instagram.com/about/legal/privacy/.
– Twitter (Twitter Inc., 1355 Market Street, Suite 900, San Francisco, CA 94103, USA) – Datenschutzerklärung: https://twitter.com/de/privacy, Opt-Out: https://twitter.com/personalization, Privacy Shield: https://www.privacyshield.gov/participant?id=a2zt0000000TORzAAO&status=Active.
– Pinterest (Pinterest Inc., 635 High Street, Palo Alto, CA, 94301, USA) – Datenschutzerklärung/ Opt-Out: https://about.pinterest.com/de/privacy-policy.
– LinkedIn (LinkedIn Ireland Unlimited Company Wilton Place, Dublin 2, Irland) – Datenschutzerklärung https://www.linkedin.com/legal/privacy-policy , Opt-Out: https://www.linkedin.com/psettings/guest-controls/retargeting-opt-out, Privacy Shield: https://www.privacyshield.gov/participant?id=a2zt0000000L0UZAA0&status=Active.
– Xing (XING AG, Dammtorstraße 29-32, 20354 Hamburg, Deutschland) – Datenschutzerklärung/ Opt-Out: https://privacy.xing.com/de/datenschutzerklaerung.
– Wakalet (Wakelet Limited, 76 Quay Street, Manchester, M3 4PR, United Kingdom) – Datenschutzerklärung/ Opt-Out: https://wakelet.com/privacy.html.
– Soundcloud (SoundCloud Limited, Rheinsberger Str. 76/77, 10115 Berlin, Deutschland) – Datenschutzerklärung/ Opt-Out: https://soundcloud.com/pages/privacy.
Einbindung von Diensten und Inhalten Dritter
Wir setzen innerhalb unseres Onlineangebotes auf Grundlage unserer berechtigten Interessen (d.h. Interesse an der Analyse, Optimierung und wirtschaftlichem Betrieb unseres Onlineangebotes im Sinne des Art. 6 Abs. 1 lit. f. DSGVO) Inhalts- oder Serviceangebote von Drittanbietern ein, um deren Inhalte und Services, wie z.B. Videos oder Schriftarten einzubinden (nachfolgend einheitlich bezeichnet als “Inhalte”).
Dies setzt immer voraus, dass die Drittanbieter dieser Inhalte, die IP-Adresse der Nutzer wahrnehmen, da sie ohne die IP-Adresse die Inhalte nicht an deren Browser senden könnten. Die IP-Adresse ist damit für die Darstellung dieser Inhalte erforderlich. Wir bemühen uns nur solche Inhalte zu verwenden, deren jeweilige Anbieter die IP-Adresse lediglich zur Auslieferung der Inhalte verwenden. Drittanbieter können ferner so genannte Pixel-Tags (unsichtbare Grafiken, auch als “Web Beacons” bezeichnet) für statistische oder Marketingzwecke verwenden. Durch die “Pixel-Tags” können Informationen, wie der Besucherverkehr auf den Seiten dieser Website ausgewertet werden. Die pseudonymen Informationen können ferner in Cookies auf dem Gerät der Nutzer gespeichert werden und unter anderem technische Informationen zum Browser und Betriebssystem, verweisende Webseiten, Besuchszeit sowie weitere Angaben zur Nutzung unseres Onlineangebotes enthalten, als auch mit solchen Informationen aus anderen Quellen verbunden werden.
Youtube
Wir binden die Videos der Plattform “YouTube” des Anbieters Google LLC, 1600 Amphitheatre Parkway, Mountain View, CA 94043, USA, ein. Datenschutzerklärung: https://www.google.com/policies/privacy/, Opt-Out: https://adssettings.google.com/authenticated.
Innerhalb unseres Onlineangebotes können Funktionen und Inhalte des Dienstes Twitter, angeboten durch die Twitter Inc., 1355 Market Street, Suite 900, San Francisco, CA 94103, USA, eingebunden werden. Hierzu können z.B. Inhalte wie Bilder, Videos oder Texte und Schaltflächen gehören, mit denen Nutzer Inhalte dieses Onlineangebotes innerhalb von Twitter teilen können.
Sofern die Nutzer Mitglieder der Plattform Twitter sind, kann Twitter den Aufruf der o.g. Inhalte und Funktionen den dortigen Profilen der Nutzer zuordnen. Twitter ist unter dem Privacy-Shield-Abkommen zertifiziert und bietet hierdurch eine Garantie, das europäische Datenschutzrecht einzuhalten (https://www.privacyshield.gov/participant?id=a2zt0000000TORzAAO&status=Active). Datenschutzerklärung: https://twitter.com/de/privacy, Opt-Out: https://twitter.com/personalization.
Instagram
Innerhalb unseres Onlineangebotes können Funktionen und Inhalte des Dienstes Instagram, angeboten durch die Instagram Inc., 1601 Willow Road, Menlo Park, CA, 94025, USA, eingebunden werden. Hierzu können z.B. Inhalte wie Bilder, Videos oder Texte und Schaltflächen gehören, mit denen Nutzer Inhalte dieses Onlineangebotes innerhalb von Instagram teilen können. Sofern die Nutzer Mitglieder der Plattform Instagram sind, kann Instagram den Aufruf der o.g. Inhalte und Funktionen den dortigen Profilen der Nutzer zuordnen. Datenschutzerklärung von Instagram: http://instagram.com/about/legal/privacy/.
LinkedIn
Innerhalb unseres Onlineangebotes können Funktionen und Inhalte des Dienstes LinkedIn, angeboten durch die LinkedIn Ireland Unlimited Company Wilton Place, Dublin 2, Irland, eingebunden werden. Hierzu können z.B. Inhalte wie Bilder, Videos oder Texte und Schaltflächen gehören, mit denen Nutzer Inhalte dieses Onlineangebotes innerhalb von LinkedIn teilen können. Sofern die Nutzer Mitglieder der Plattform LinkedIn sind, kann LinkedIn den Aufruf der o.g. Inhalte und Funktionen den dortigen Profilen der Nutzer zuordnen. Datenschutzerklärung von LinkedIn: https://www.linkedin.com/legal/privacy-policy.. LinkedIn ist unter dem Privacy-Shield-Abkommen zertifiziert und bietet hierdurch eine Garantie, das europäische Datenschutzrecht einzuhalten (https://www.privacyshield.gov/participant?id=a2zt0000000L0UZAA0&status=Active). Datenschutzerklärung: https://www.linkedin.com/legal/privacy-policy, Opt-Out: https://www.linkedin.com/psettings/guest-controls/retargeting-opt-out.

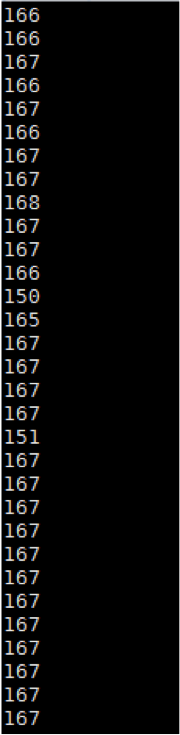 On the contrary, when streaming data from the pressure sensor, there was no “live” stream of data. Instead, one had to actually apply a pressure to the sensor in order to initiate the data stream. Interestingly, the harder one applied pressure, the SMALLER the value became up to a 20 lb limit (according to the sensor specifications) at which point the sensor streamed a value of 0. Increasingly lighter pressures would result in spiking values at times reaching the value of thousands at a feather’s touch.